Create and Setup Project in Eclipse

For this project I have used the following tools:

  1. Eclipse Luna
  2. Tomcat 7
  3. JRE and JDK for Java 7

In Eclipse, create a new Maven Project. Image for Screenshot_1

For simplicity, check the box for Create a simple project (skip archetype selection). Image for Screenshot_2

Click on Next and make sure you enter the following details:
Group Id: com.example
Artifact Id: jersey_example
Packaging: jar
Name: jersey_example
Image for Screenshot_3
Click on Finish and you will have created a new Maven Project.

Click on the project jersey_example that you have just created in the Project Explorer. Open pom.xml. Image for Screenshot_4

Now right click on the project jersey_example in the Project Explorer and open up its Properties. Click on Project Facets on the left pane of the Properties and click on Convert to faceted form... link on its right. Image for Screenshot_5
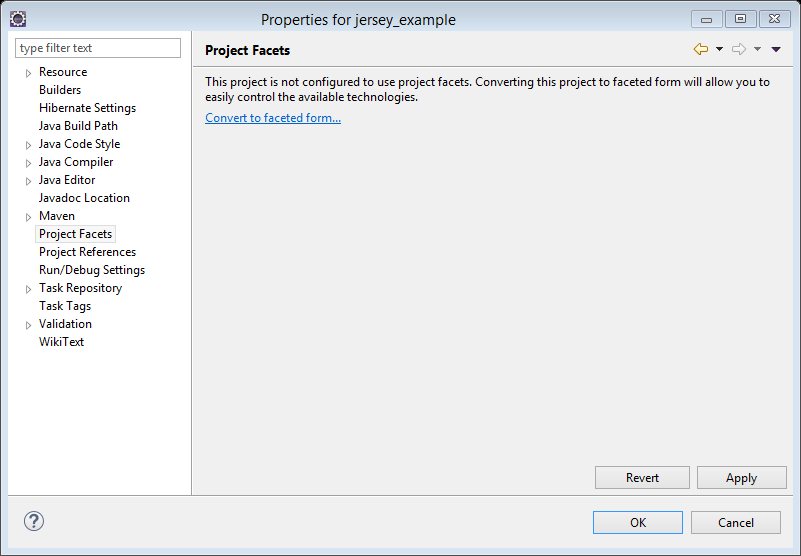
Make sure you check Dynamic Web Module and its version is 3.0. You should be able to see a new link blink at the bottom of the Properties window saying Further configuration available. Image for Screenshot_6

A new popup will be shown as follows. Check the box for Generate web.xml deployment descriptor and click OK. Image for Screenshot_7
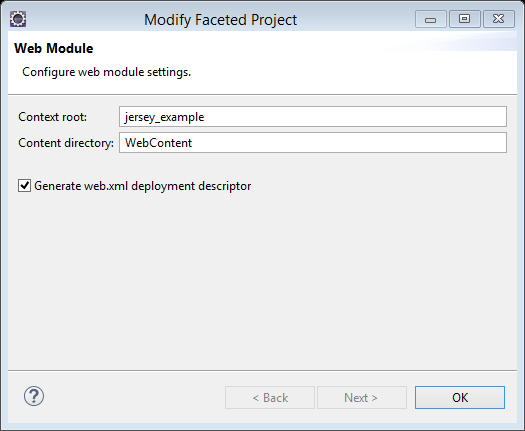
Once you click on OK the previous Properties window will be shown. Click on OK and reopen the Properties window of your project. Open the Deployment Assembly. Image for Screenshot_8
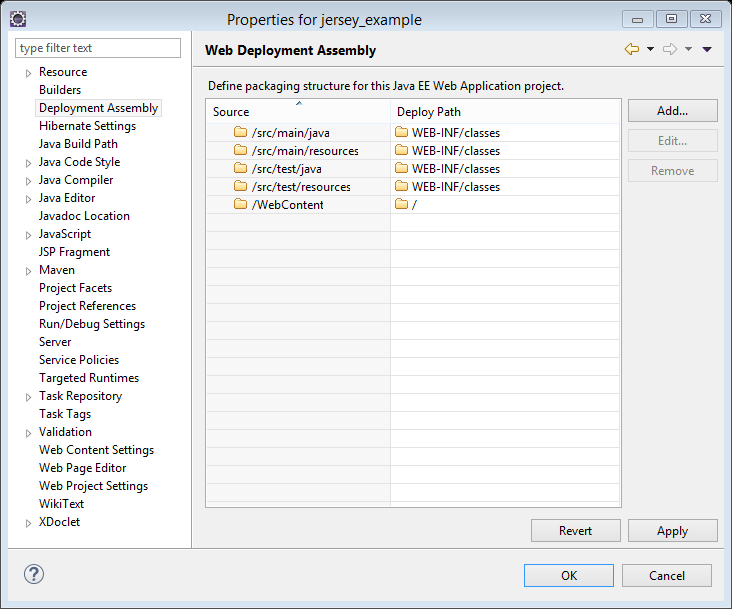
Click on Add and select Java Build Path Entries from the window that pops open. Image for Screenshot_9
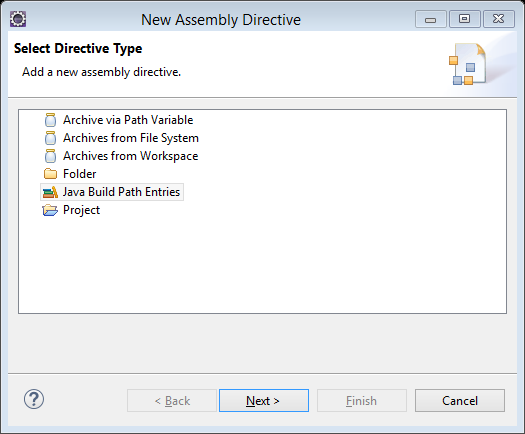
Select Maven Dependencies and click on Finish. Image for Screenshot_10
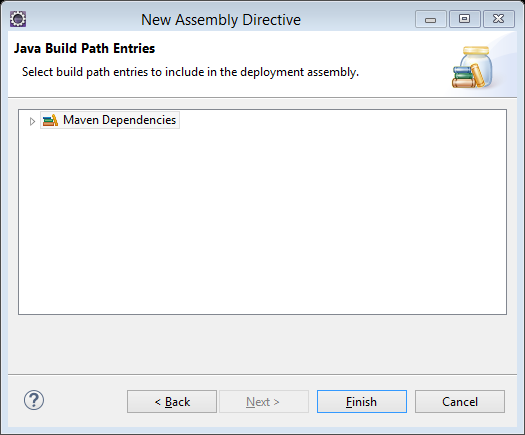
The Deployment Assembly of your project will now look like this: Image for Screenshot_11

Now add all the following Dependencies in pom.xml:

  1. jersey-container-servlet v2.21
  2. jersey-server v2.21
  3. jersey-media-moxy v2.21

Make sure all the versions are the same - in case you get a new version. In order to add a Dependency in pom.xml, click on the tab Dependencies in pom.xml, and click on Add button. Enter the name of the dependency you want to add and you will see the following set of Search Results: Image for Screenshot_12

In case you do not get any indexed search results, go to Eclipse->Windows->Preferences->Maven and make sure the following items are checked: * Download Artifact Sources * Download Artifact JavaDoc * Download repository index updates on startup Apply these changes and restart your Eclipse. Based on the speed of the network connection, it will take longer time to display the search results.

Your dependencies will now appear as follows:
Image for Screenshot_13

Right click on pom.xml in the Project Explorer and Run As->Maven build. Enter the build configuration goal as clean install. Also ensure Update Snapshots, Debug Output and Skip Tests are checked.
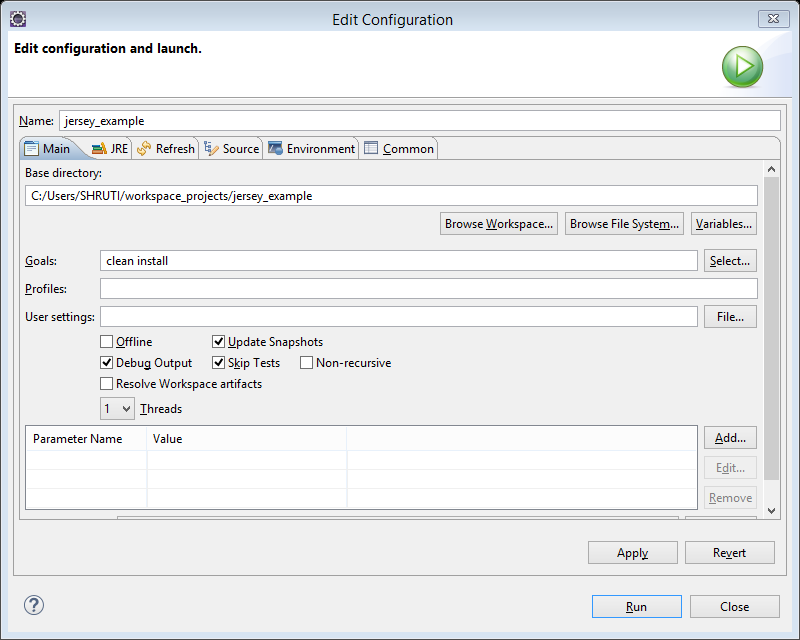
Image for Screenshot_14

When you click on Run and all goes well, you will see the following output in the Console - BUILD SUCCESS. Image for Screenshot_15
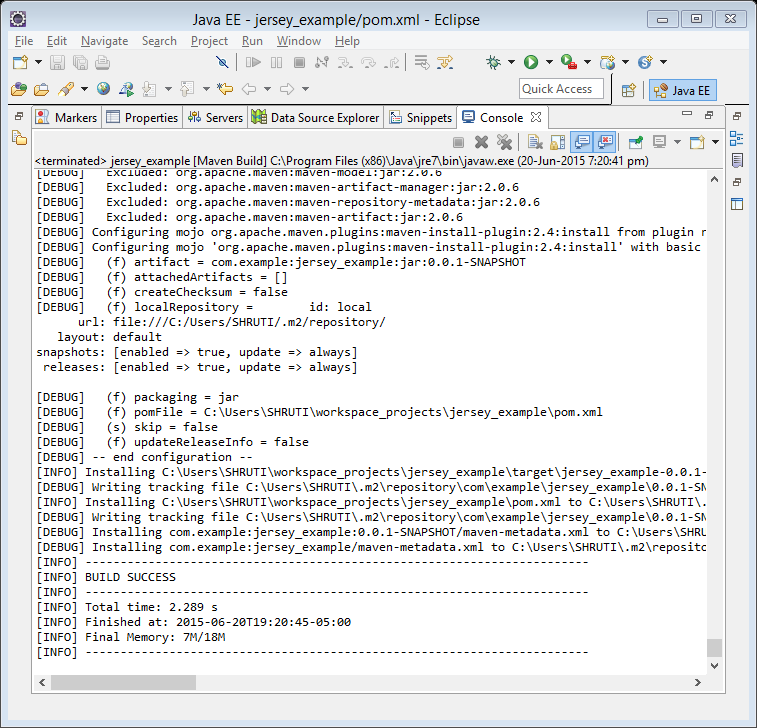
As you have downloaded all the required jars for building a Jersey based JAX-RS, you can now create a new sample web service. Maven makes it easy to download all the required jars in one place without you having to manually search and download and reference them for your projects. When you share your projects with other developers, all they need to do is to Run the pom.xml file and get all the required jars, without having to worry about downloading and mistakenly using different versions of jars.
Develop a Web Service

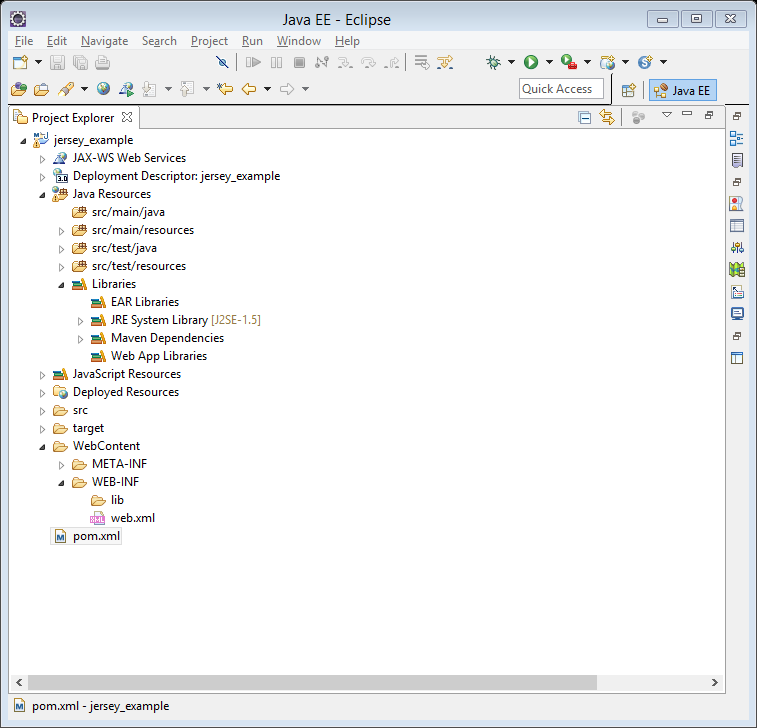
Your project hierarchy will appear as follows in Eclipse: Image for Screenshot_16

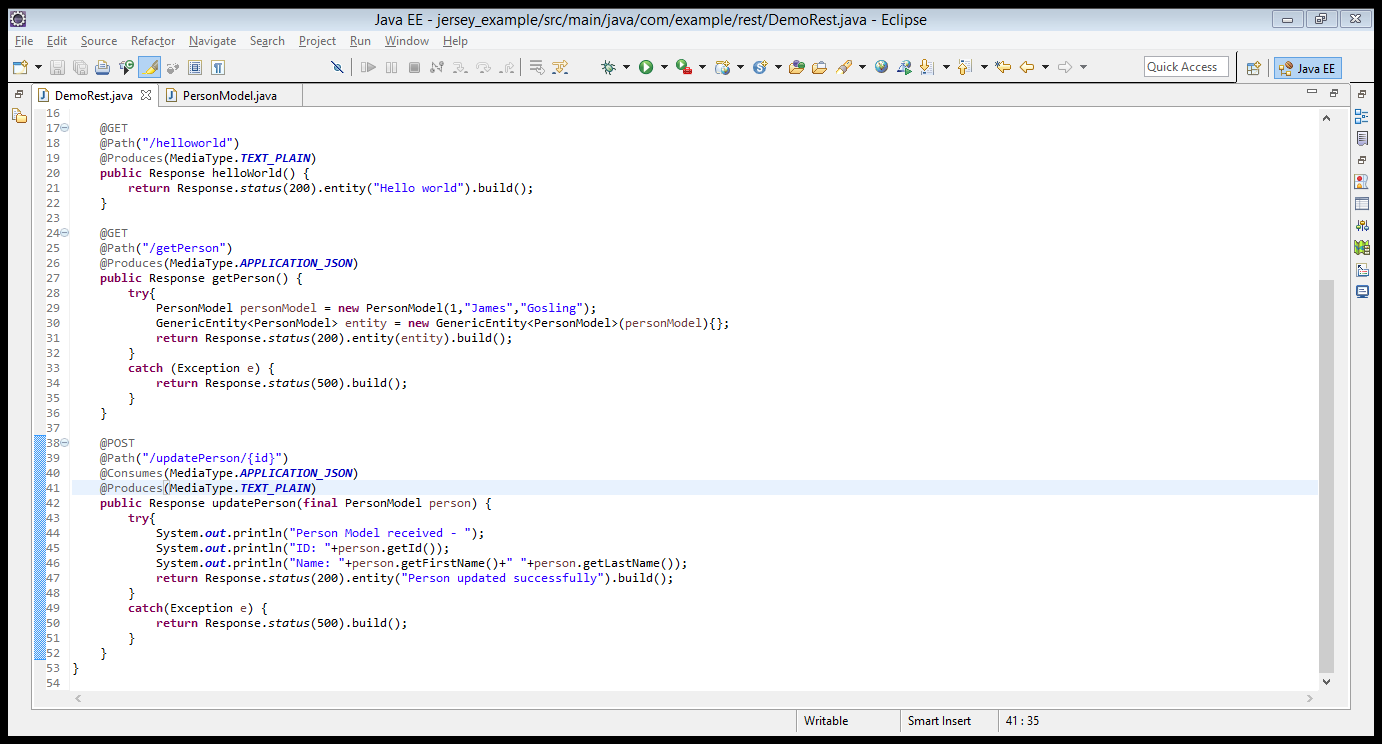
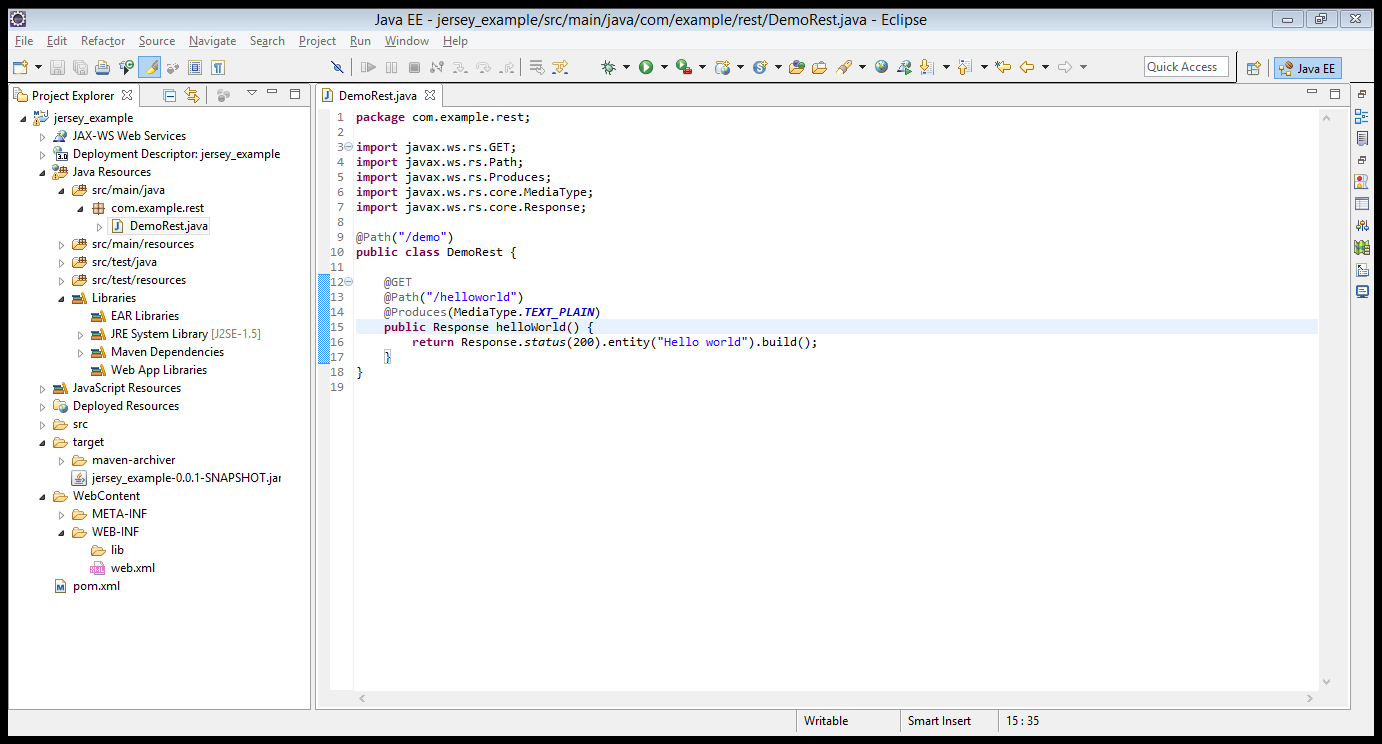
Create a new class DemoRest in package com.example.rest and enter the code as shown in the screenshot. Image for Screenshot_17 For now, you have created a simple web service that displays a plain-text response Hello World! on the web browser, when the request is sent.
Add the following code snippet in WebContent->WEB-INF->web.xml. This makes sure that all the appropriate requests are sent to the classes in the package com.example.rest. Image for Screenshot_18

Run and Test the Web Service

To test your web service, simply add the project in the server and start the server. I have used Tomcat 7 for this project.

Make sure the Server window is visible in Eclipse. If not then go to Eclipse->Window->Show View->Other...->Server.

Add a new server - Apache Tomcat v7.0 server and make sure you have the corresponding version of the server runtime environment configured.

Then add the project jersey_example to this new server and click on Start button. Open up your favorite browser and click on the following link: http://localhost:8080/jersey_example/rest/demo/helloworld

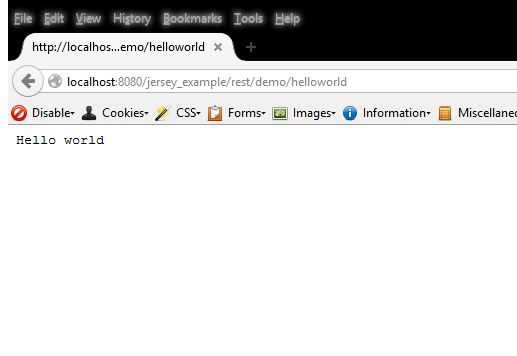
You will see Hello World displayed in the browser. Image for Screenshot_19

Create Web Service with JSON Request/Response

In large-scale web applications, you would typically be receiving and sending data in XML or JSON format across the web.
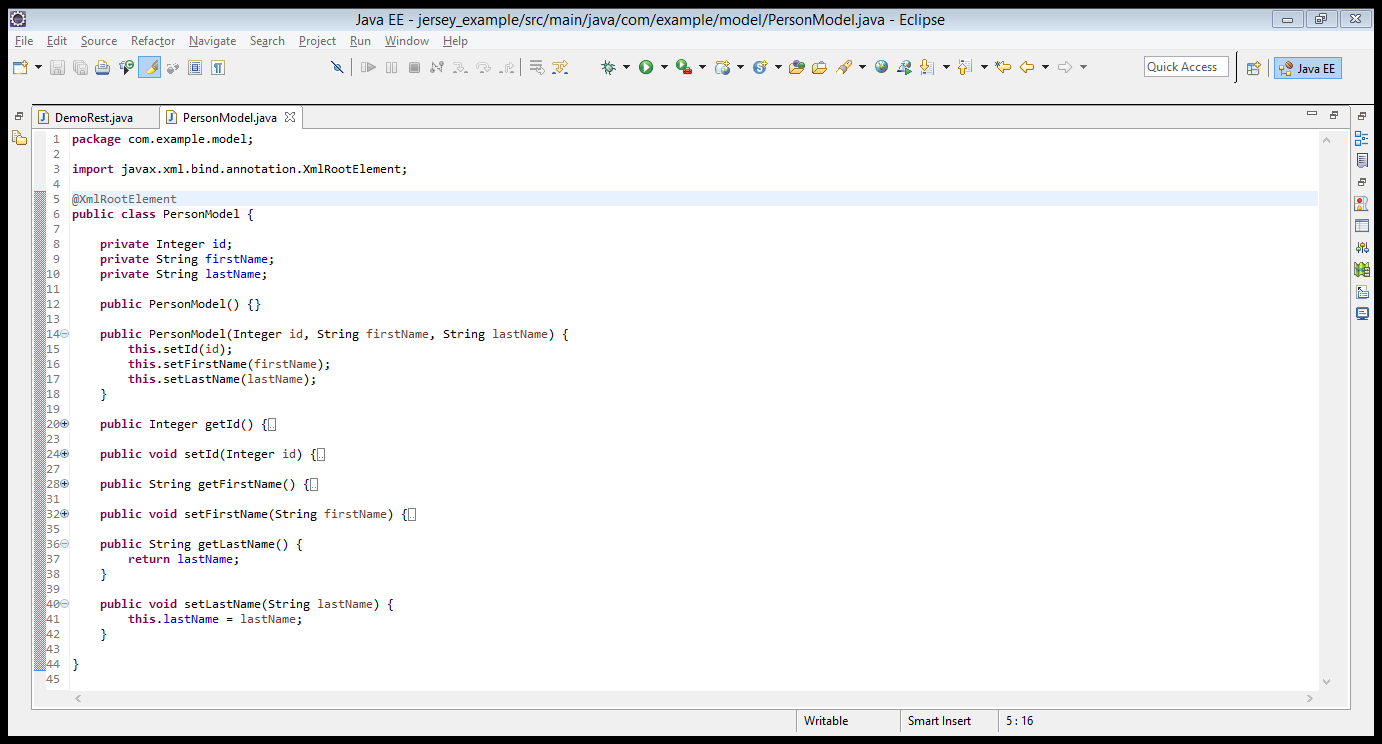
Make sure you are using Java6+ when you are creating web services that send JSON/XML responses. The annotation @XmlRootElement ensures that your POJO can be serialised into a JAX-RS response.
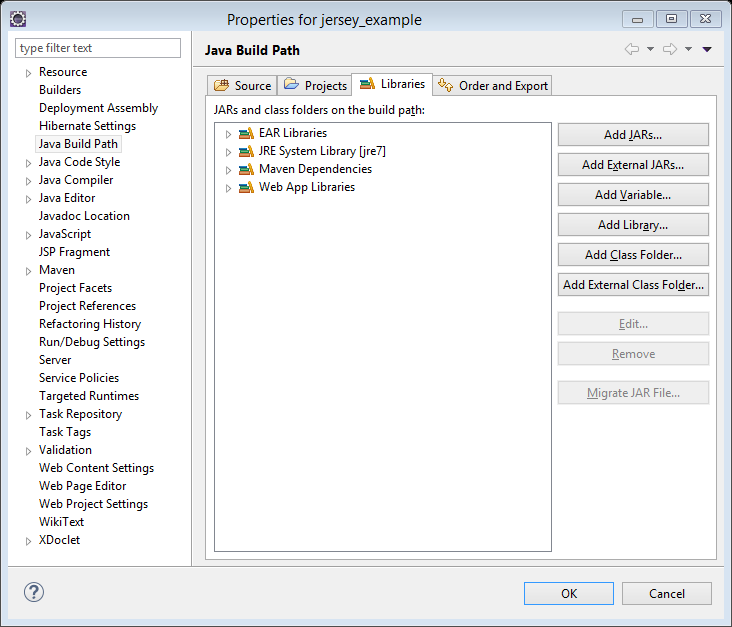
You can change the settings in the Java Build Path of the project by choosing the appropriate JRE System Library. Image of Screenshot_20

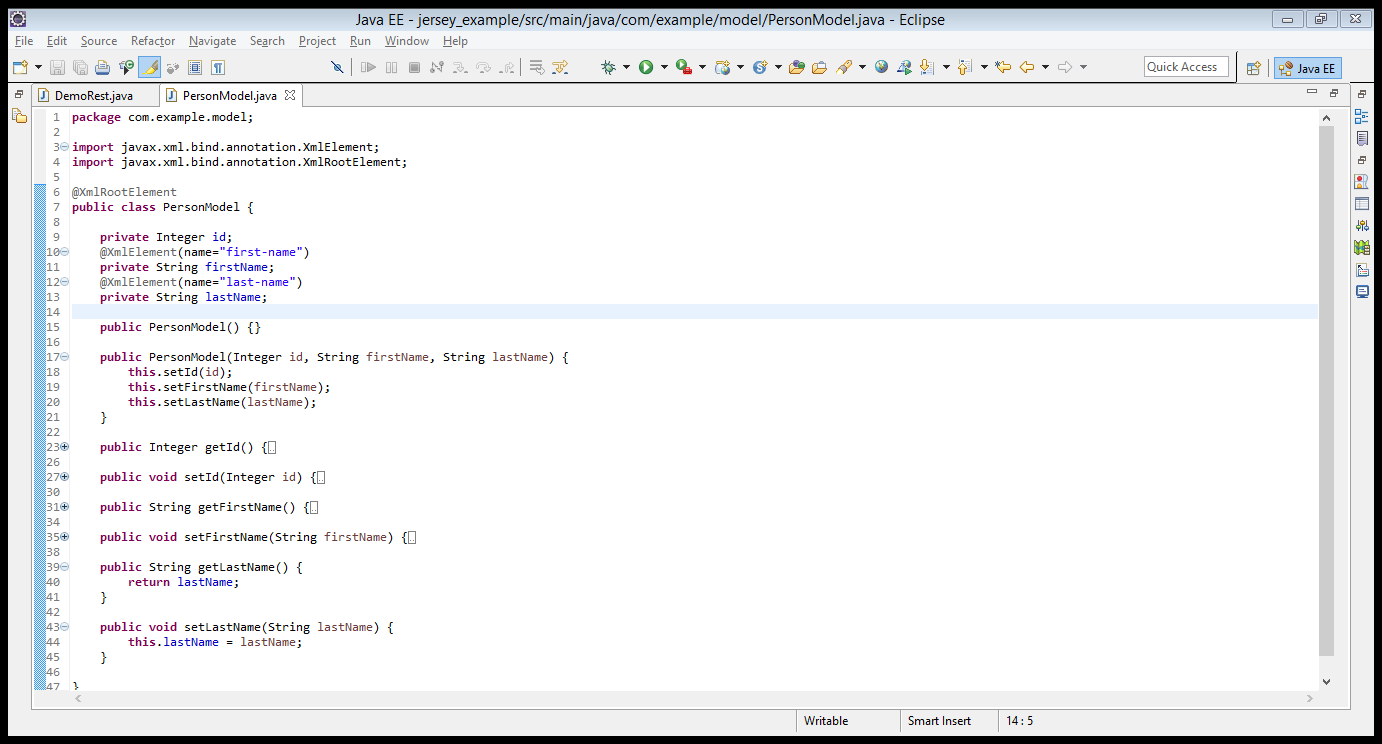
Next, create a Plain-Old Java Object (POJO) class using which you can encase your response data. For demonstration, I have created a Person object with id, firstName, and lastName as its attributes.
Image of Screenshot_21

Now create a JAX-RS that can send a Person object in JSON format. For this, you need to use the annotation @Produces to specify the type of response-data that is sent.
Image of Screenshot_22

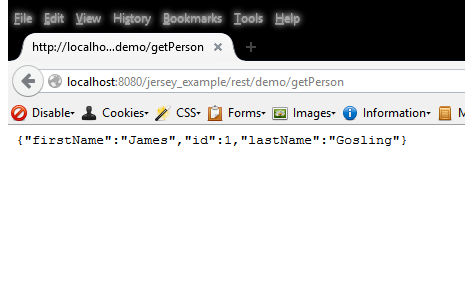
When you click on the web browser the following link, you will be able to see the Person object data:
http://localhost:8080/jersey_example/rest/demo/getPerson
Image of Screenshot_23

Now you can receive an updated Person object using @Consumes annotation. Just add the updatePerson method in DemoRest class.
Image of Screenshot_24

Sometimes, you may want to change the name of the property of the Person object in JSON format. By default, the properties are named in the way the attributes are named. You can override it with the help of @XmlElement annotation.
Image of Screenshot_25

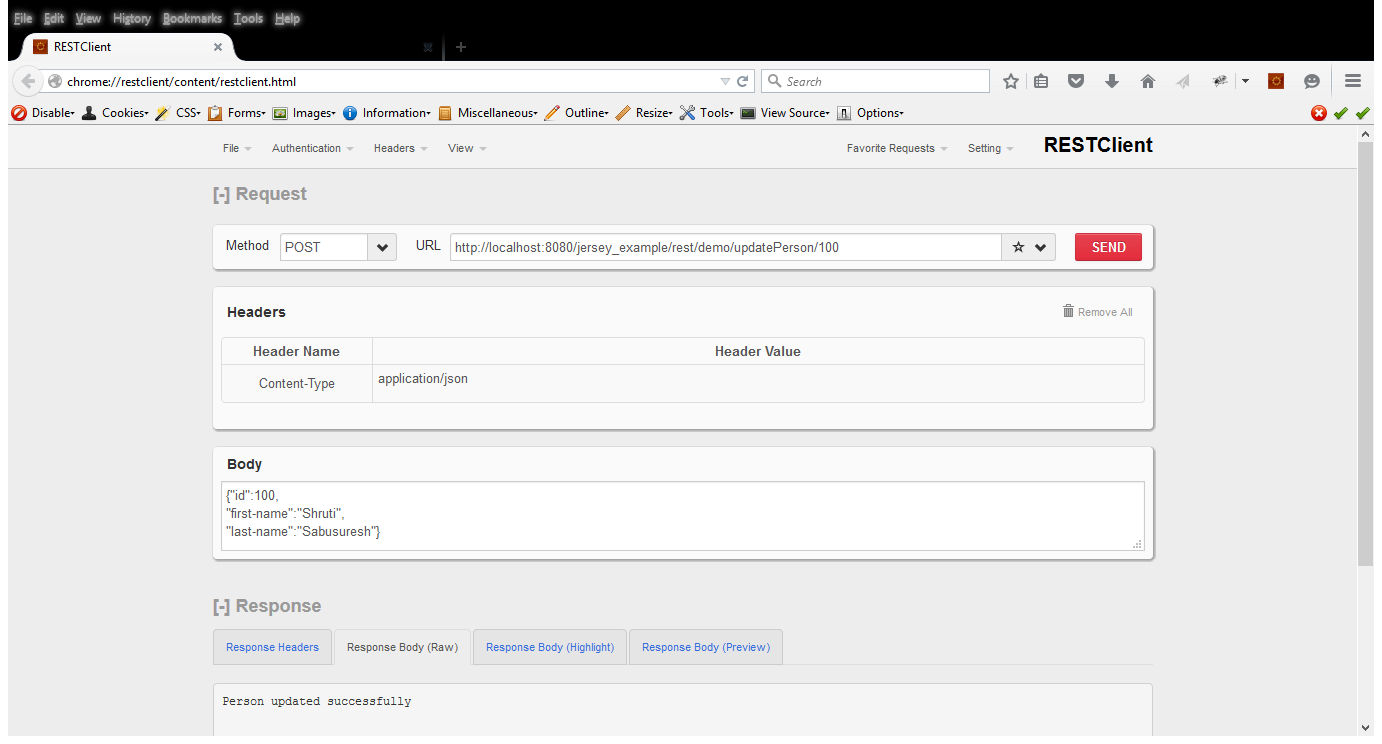
Now to test your web service, you can use RESTClient add-on for Mozilla Firefox. You can type in the link for sending the request to the web service, enter the JSON request in the Body of Request, and select Headers as application/json. You will then be able to see the Person object data that you sent from the browser on the Eclipse console.
Image of Screenshot_26

You can try and download a working project from my Github account.

Tools and Technologies Used

Java, JAX-RS using Jersey, Maven, POJO, Eclipse, Tomcat and RESTClient add-on for Mozilla Firefox